Flower Pot Pocket Card
by Stephanie Luman
Send a friend flowers that won't wilt or fade with this cute pocket card.
Supplies
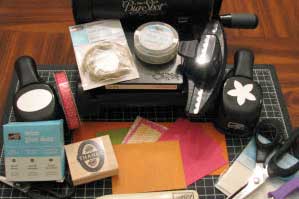
- One 9” x 3 ½” piece of cardstock – flower pot (shown in Pumpkin Pie)
- One 2 ¼” x 4 ¼” piece of cardstock – pocket insert (shown in Whisper White)
- One 2 ½” x 4 ½” piece of cardstock – pocket insert mat (shown in Pumpkin Pie)
- Three 3” x 3” pieces of patterned paper – flowers (shown in Razzleberry Lemonade)
- Three 3” x 3” pieces of cardstock – flower backing (shown in Melon Mambo)
- One 3” x 3 ½” piece of patterned paper – flower pot front (shown in Razzleberry Lemonade)
- Two 2 ½” x 2 ½” pieces of cardstock - leaves (shown in Old Olive)
- Three scrap pieces of patterned paper - flower centers (shown in Razzleberry Lemonade)
- Stamp – inside verse (Stampin’ Up! Curvy Verses shown here)
- Ink (shown in Dusty Durango)
- Die Cut Machine & Flower Die (Big Shot & Originals Die Flower Layers #3 shown here)
- Paper Punches (5-Petal Flower Punch, Scallop Edge Punch & ¾” Circle Punch shown here)
- Portable Paper Cutter (Fiskars 12” Deluxe Portable Paper Trimmer shown here)
- Clear Button
- 14” of Ribbon (Dusty Durango ½” Polka Dot Grosgrain shown here)
- Adhesive (Mini Glue Dots & Stampin’ Dimensionals shown here)
Step-by-Step
-
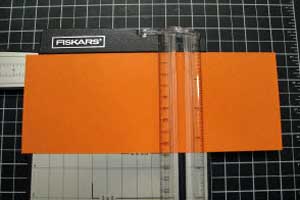
Step 1
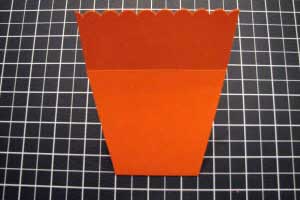
Score 9” x 3 ½” piece of cardstock in landscape position at 2” and 5 ½”.
-
Step 2
Fold the 2” score line in a mountain fold and the 5 ½” score line in a valley fold.

-
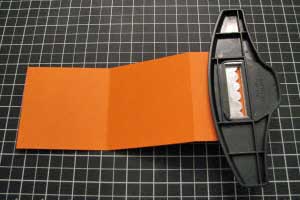
Step 3
Punch the edge of the 2” front flap with the Scallop Edge Punch.
-
Step 4
To create the flower pot shape, place the cardstock in the paper trimmer with the top 2” flap flipped up and the bottom flap folded behind.
Line up the 2” score line with the cutting track and the 5 ½” fold line with the ½” mark on the trimmer.
Place the cutting guide over the card and cut.
Turn cardstock and repeat.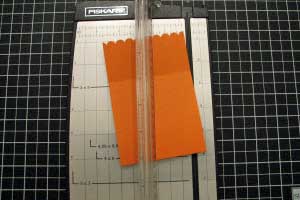
-
-
Step 5
Adhere the 3” x 3 ½” piece of patterned paper to the bottom front of the flower pot.
Flip the flower pot over and trim away the excess patterned paper from each side.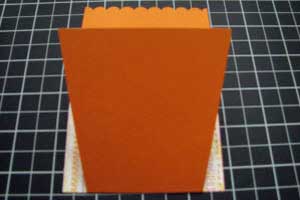
-
Step 6
Tie ribbon around the top part of the flower pot to hold the pot together, no adhesive needed.
Attach a tag to the ribbon if desired.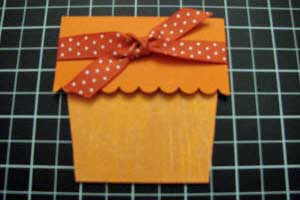
-
Step 7
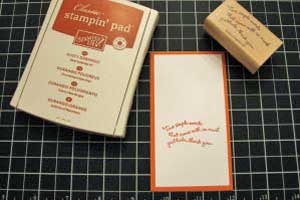
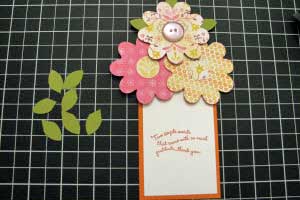
Adhere the 2 ¼” x 4 ¼” piece of cardstock to the 2 ½” x 4 ½” piece of cardstock. This will be the insert piece with the flowers attached at the top. Stamp your sentiment on the lower portion.
-
Step 8
For each flower, use one piece of 3” x 3” patterned paper and one piece of 3” x 3” cardstock .
Apply a small bit of adhesive between the squares before running thru the Big Shot™ to keep them together.
-
Step 9
Run each 3” x 3” piece through a die cut machine to create the flowers.
Punch ¾” circles out of scrap patterned paper for flower centers and adhere to center of two flowers.
For the third flower, adhere ¾” circle to a clear button with a glue dot and then attach to the center of the flower.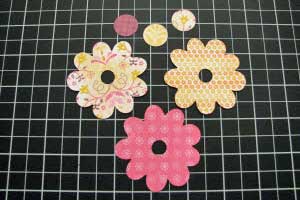
-
Step 10
Punch each 2 ½” x 2 ½” piece of cardstock with the 5-Petal Flower Punch and cut apart to create leaves.

-
Step 11
Attach 2 flowers to top of insert piece with dimensionals. Attach top flower to one of the other flowers.
Tip:
To help with alignment, place insert piece inside of flower pot before attaching flowers.
If you want your card to fit in an A2 envelope, line the envelope up underneath the card and use as a guide while attaching the flowers to make sure they're not too tall or wide.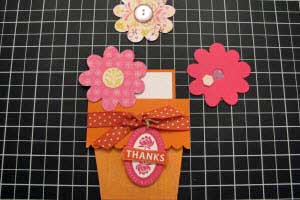
-
Step 12
To attach the leaves, place adhesive on end of each leaf and adhere in between the flower layers.
-
Step 13
Finish your card.
Special thanks to Linda Heller and Missy Shipman for your inspiration.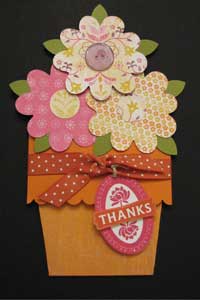
Video!
Your Turn
You've seen the tutorial, now you try it! We've got a section of the gallery set aside for Flower Pot Pocket Card. Try this technique, then upload your artwork to the gallery. Show us your creations!
***Please note - Internet Explorer/Edge is not a supported browser, and will not allow you to see the videos. Please use Chrome, Firefox or Safari to view our tutorial videos.

Questions and Comments
We'd love to get your feedback or questions. Leave your comment below.
Hugs and smiles
Thank you,
Peggy
Yes, I cut the card base to create the flower pot shape. I did that right after punching and sponging the edge of the flap. You can either check the video, or look up at step 4.
Hugs and smiles
dianna
Cathy Sue
sam
Page 1 of 4 pages 1 2 3 > Last »